
Setup Instructions
This page includes all of our setup instructions, organized by platform. We do not recommend that you present instructions to students this way. Instead, please pick and choose the bits of setup that are most appropriate to their needs.
Overviews
The Bash Shell
Bash is a commonly-used shell. Using a shell gives you more power to do more tasks more quickly with your computer.
Mac
The default shell in Mac OS X is bash.
Windows
Install Git Bash. You can accept all of the default options as recommended by the installer.
Linux
The default shell is usually bash but if not you can get to bash by opening a terminal and typing bash.
Editor
When you're writing code, it's nice to have a text editor that is optimized for writing code, with features like automatic color-coding of key words.
Mac
We recommend Text Wrangler, Sublime Text, or Text Mate 2.
Windows
Notepad++ is a popular free code editor for Windows. You'll also need to install the command line editor nano, which you can do by downloading this script and running it using the instructions below for testing your setup.
Linux
Git
Git is a state-of-the-art version control system. It lets you track who made changes to what when and has options for easily updating a shared or public version of your code on github.com.
Mac
Download and install the most recent version from hereWindows
Install Git Bash. You can accept all of the default options as recommended by the installer.
Linux
If git is not already available on your machine you can try to install it via your distro's package manager (e.g. apt-get git).
Python
Python is becoming more and more popular in scientific computing, and it's a great language for teaching general programming concepts due to its easy-to-read syntax. We will be using Python version 2.7. Installing all the scientific packages for Python individually can be a bit difficult, so we recommend using an all-in-one installer.
Please install Enthought Canopy .
Windows
Windows / Anaconda Python
- Download and install Anaconda CE.
- Use all of the defaults for installation except before pressing Finish make sure to check Make Anaconda the default Python.
Windows / Git Bash
Install Git Bash following these instructions. This gives you Git as well as Bash.
Windows / Cygwin
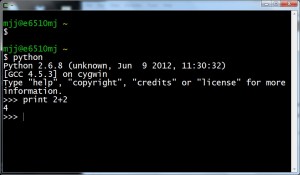
For Cygwin under Windows, start the Cygwin Terminal by clicking on its desk-top icon:
![]()
Or browse using Windows Explorer to C:\cygwin\bin\
and double-click on mintty.exe.
You should see a terminal window like:
Your home directory—the one the Cygwin Terminal defaults to—can
be found at C:\cygwin\home\your-user-name\.
Windows / Editor
Notepad++ is a popular free code editor for Windows.
Windows / Git Bash
Install Git Bash following the instructions here. This gives you Bash as well as Git.
Windows / Mercurial
Windows / Python
For Windows we recommend the Enthought Canopy distribution since it seems to work well with Git Bash.
For other options check the Python4Astronomers page on installing scientific Python.
Windows / SQLite
-
Download
sqlite-shell-win32-x86-SOMENUMBERS.zipfrom the SQLite download page. - Unzip the file.
-
Copy
sqlite.exeintoC:\Windows.
Windows / Software Carpentry Installer
- Download the installer.
- If the file opens directly in the browser select File→Save Page As to download it to your computer.
- Double click on the file to run it.
Mac OS X
Mac OS X / Common
These instructions were tested using Mac OS X 10.7.4, which comes with:
- Bash shell
- vi and nano text editors
- Python 2.7
- Python setuptools
- sqlite3
All installation needs to be done as a root user or user with certain administrator privileges.
Mac OS X / Bash
The default shell in all versions of Mac OS X is bash,
so no need to install anything. You access bash from
the Terminal (found
in /Applications/Utilities). You may want
to keep Terminal in your dock for this workshop.
Mac OS X / Editor
We recommend Text Wrangler or Sublime Text.
Mac OS X / Git
Installing Git may require you to first install XCode. This is a very large download (several gigabytes), so please do it before arriving at the bootcamp.
For Mac OS X 10.7 and 10.8:
Go to the Xcode website. Get XCode from the App Store making certain to install the command line tools (from the Download preferences pane). Git is included in the command line tools.
For Mac OS X 10.6
If you have Mac OS X 10.6,
first get XCode by going to
the Apple developer site.
You have to sign in with an Apple ID linked to a Developer account.
If you don't have one,
you can register and create one.
Once you log in,
go to page 8 and find "XCode 3.2.6 and iOS SDK 4.3 for Snow Leopard".
Click to open that section,
and then download the .dmg file.
Finally,
install just git.
Mac OS X / Make
If you do not already have access to make from within your shell,
you will need to install XCode (which is free, but over a gigabyte to download).
- Go to the Apple app store
- Search for XCode
- Click Free
- Click Install App
Once XCode has installed:
- Click Applications
- Click XCode
- Select XCode→Preferences...
- Click Downloads
- Select Command Line Tools
- Click Install
You will now be able to run make within your Bash shell.
Mac OS X / Mercurial
Download and install the Mac binary package. If your bootcamp is also using the EasyMercurial GUI, download the Mac binary package.
Mac OS X / Python Nose
Run:
$ easy_install nose
and then run:
$ nosetests
You should see something like:
----------------------------------------------------------------------
Ran 0 tests in 0.003s
OK
Mac OS X / Python
We recommend the all-in-one scientific Python installer Anaconda. (Installation requires using the shell and if you aren't comfortable doing the installation yourself just download the installer and we'll help you at the boot camp.)
- Download the installer that matches your operating system and save it in your home folder.
- Open a terminal window.
-
Type
bash Anaconda-
and then press tab. The name of the file you just downloaded should appear. -
Press enter. You will follow the text-only
prompts. When there is a colon at the bottom of the
screen press the down arrow to move down through the
text. Type
yesand press enter to approve the license. Press enter to approve the default location for the files. Typeyesand press enter to prepend Anaconda to yourPATH(this makes the Anaconda distribution the default Python).
Mac OS X / Terminal
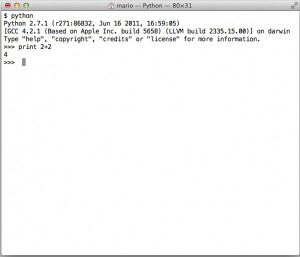
Browse to the Applications folder, then into the Utilities folder and open the Terminal application. You should see a terminal window like:
Your home directory—the one the terminal defaults to—can be found at
/Users/your-user-name.
Generic Linux
Linux / Bash
The default shell is usually bash,
but if your machine is set up differently
you can run it by opening a terminal and typing bash.
There is no need to install anything.
Linux / Editor
Kate is one option for Linux users.
Linux / Git
If Git is not already available on your machine you can try
to install it via your distro's package manager
(e.g. apt-get).
Linux / Python
We recommend the all-in-one scientific Python installer Anaconda. (Installation requires using the shell and if you aren't comfortable doing the installation yourself just download the installer and we'll help you at the boot camp.)
- Download the installer that matches your operating system and save it in your home folder.
- Open a terminal window..
-
Type
bash Anaconda-
and then press tab. The name of the file you just downloaded should appear. -
Press enter. You will follow the text-only
prompts. When there is a colon at the bottom of the
screen press the down arrow to move down through the
text. Type
yesand press enter to approve the license. Press enter to approve the default location for the files. Typeyesand press enter to prepend Anaconda to yourPATH(this makes the Anaconda distribution the default Python).
Red Hat Scientific Linux
Red Hat Scientific Linux
Scientific Linux 6 already comes with:
- Bash shell
- Make
- vi text editor
All installation needs to be done as a root user or user with certain administrator privileges. If you have such access you can do:
$ sudo su -
and then enter your usual password.
The yum commands used in the instructions
were tested using Scientific Linux release 6.2 (Carbon).
Red Hat Scientific Linux / EasyMercurial
If your bootcamp is using the EasyMercurial GUI,
download the EasyMercurial Debian/Ubuntu source package.
This can be done at the command-line by copying the download link from the download page
(using right-click and Copy Shortcut)
then using wget,
e.g.:
$ wget https://code.soundsoftware.ac.uk/attachments/download/489/EasyMercurial-1.2.2-src.tar.gz
(This link may have been updated since this page was written, so check the download page above for the URL to use.) Next, unpack the distribution:
$ gunzip EasyMercurial-1.2.2-src.tar.gz
$ tar -xf EasyMercurial-1.2.2-src.tar
$ cd EasyMercurial-1.2.2-src
Install dependencies:
$ yum install qt4
$ yum install qt4-devel
$ yum install PyQt4
and then build
(the EasyMercurial README says to use qmake
but I used qmake-qt4):
$ qmake-qt4
$ make
Finally, run:
$ ./EasyMercurial
Red Hat Scientific Linux / Emacs or XEmacs
Run:
$ yum install emacs
$ emacs --version
Run:
$ yum install xemacs
$ xemacs --version
Red Hat Scientific Linux / Mercurial
If you are using the latest version of EasyMercurial then you need at least Mercurial 1.7. Unfortunately the easy-to-use command:
$ yum install mercurial
only installs 1.4,
so we need to build from source.
First,
download the Mercurial source package.
This can be done at the command-line by copying the download link from the download page
(using right-click and Copy Shortcut)
then using a wget,
e.g.:
$ wget http://mercurial.selenic.com/release/mercurial-2.3.2.tar.gz
(This link may have been updated since this page was written, so check the download page above for the URL to use.) Second, unpack the distribution:
$ gunzip mercurial-2.3.2.tar.gz
$ tar -xf mercurial-2.3.2.tar
$ cd mercurial-2.3.2
Third, install dependencies:
$ yum install python-devel
$ easy_install docutils
Fourth and finally, build and install the software:
$ make install
Red Hat Scientific Linux / Nano
Run:
$ yum install nano
$ nano --version
Red Hat Scientific Linux / Python Nose
Run:
$ easy_install nose
And check:
$ nosetests
----------------------------------------------------------------------
Ran 0 tests in 0.003s
OK
Red Hat Scientific Linux / Python
Run:
$ yum install python
Red Hat Scientific Linux / Python Setuptools
Run:
$ yum install python-setuptools
Red Hat Scientific Linux / SQLite
SQLite does not need administrator privileges to run.
To install,
download the SQLite Precompiled Binaries for Linux package
from the SQLite download page.
This can be done at the command-line by copying the download link from the download page
(using right-click and Copy Shortcut) then using wget,
e.g.:
$ wget http://www.sqlite.org/sqlite-shell-linux-x86-3071401.zip
(This link may have been updated since this page was written, so check the download page above for the URL to use.) Next, unzip and make sure the binary runs:
$ unzip sqlite-shell-linux-x86-3071100.zip
$ ./sqlite3 --version
You can then copy the sqlite3 binary wherever you would like.
Red Hat Scientific Linux / Terminal
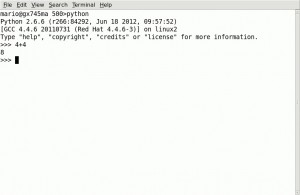
This depends on what windowing system you are using whether it be KDE, GNOME or X-windows. For example, for GNOME select the menu Applications→System Tools and select Terminal. You should see a terminal window like:
Ubuntu
Ubuntu / Common
These commands were tested using Ubuntu 11.04 running within VMWare. Ubuntu 11.04 already comes with:
- Bash shell
- Make
- vi and nano text editors
- Python 2.7
- Firefox
All installation needs to be done as a root user or user with certain administrator privileges. If you have such access you can do:
$ sudo su -
Then enter your usual password.
Ubuntu / EasyMercurial
If your bootcamp is using the EasyMercurial GUI,
download the EasyMercurial Debian/Ubuntu .deb package.
This can be done at the command-line by copying the download link from the download page
(using right-click and Copy Shortcut) then using wget,
e.g.:
$ wget https://code.soundsoftware.ac.uk/attachments/download/487/easymercurial_1.2.2cc-1_i386.deb
(This link may have been updated since this page was written, so check the download page above for the URL to use.) Next, run:
$ dpkg -i easymercurial_1.2cc-1_i386.deb
This will produce a lot of warnings about dependency problems—ignore them. Now run:
$ apt-get -f install
$ dpkg -i easymercurial_1.2cc-1_i386.deb
Go to the Applications→Programming menu and you should see an EasyMercurial command. Select it and EasyMercurial should start.
Ubuntu / Emacs or XEmacs
Run:
$ apt-get install emacs23
$ emacs --version
Run:
$ apt-get install xemacs21
$ xemacs --version
Ubuntu / Mercurial
Run:
$ apt-get install mercurial
$ hg --version
Ubuntu / Python Nose
Run:
$ easy_install nose
and check:
$ nosetests
----------------------------------------------------------------------
Ran 0 tests in 0.003s
OK
Ubuntu / Python Setuptools
Run:
$ apt-get install python-setuptools
Ubuntu / SQLite
SQLite does not need administrator privileges to run.
To install,
download the SQLite Precompiled Binaries for Linux package
from the SQLite download page.
This can be done at the command-line by copying the download link from the download page
(using right-click and Copy Shortcut) then using wget,
e.g.:
$ wget http://www.sqlite.org/sqlite-shell-linux-x86-3071401.zip
(This link may have been updated since this page was written, so check the download page above for the URL to use.) Next, unzip and make sure the binary runs:
$ unzip sqlite-shell-linux-x86-3071100.zip
$ ./sqlite3 --version
You can then copy the sqlite3 binary wherever you would like.
Ubuntu / Terminal Window
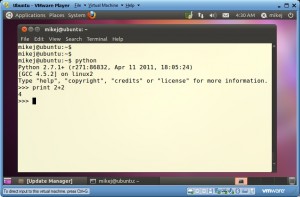
Select the menu Applications→Accessories and select Terminal. You should see a terminal window like:
Virtual Machine
Virtual Machine
Installation issues can and do happen. To ensure that you can continue to participate in a lesson even if one of your software programs fails, we provide a Linux virtual machine that contains most of the necessary software pre-installed.
Please download and install Virtual Box for your OS from here . Please download the SWC VM file from here. On the first day we will do a walkthrough of how to setup and launch the bootcamp VM through Virtual Box.
IPython Notebook
Testing IPython notebook installation
-
In your terminal window type
ipython notebook. It may take several seconds, but an IPython dashboard window should open in your web browser. - Click "new notebook".
-
In the box next to
In [ ]:enter 2+2. - Type Shift+Enter (i.e., both keys at the same time) to execute the cell.
- If the number 4 appears below the cell, you're all set! Feel free to try out some commands or simple addition.
- If not: see troubleshooting below.
You can close the browser window. If your IPython command in the previous step worked then the notebook should still be running. You won't see a Bash prompt (the $ symbol) while IPython is still running. Type Control-C (i.e., hold down the "Control" or "Ctrl" key on your keyboard and type the C key). You'll be prompted to confirm: "Shutdown Notebook Server (y/[n])?" Simply type a 'y' and Enter to shut down the server.
If a result did not appear when you tried to run 2+2, make sure you are hitting Shift+Enter (or click the little play button at the top of the window).
If Internet Explorer is your default browser, copy the URL from your IPython dashboard and open it in another browser (e.g., Firefox or Chrome). If you are using Firefox or Chrome on Windows and results still do not appear, this may be due to the Sophos antivirus. The steps below will fix this, but require administrator privileges:
- Open your Sophos Endpoint Security and Control Panel from your tray or start menu.
- Select "configure" > "Anti-virus" > "Authorization" from the menu at the top.
- Select the websites tab.
- click the "Add" button and add 127.0.0.1 and localhost to the "Authorized websites" list.
- Restart your computer.
Firefox SQLite Manager Plugin
Firefox SQLite Manager Plugin
The SQLite Manager add-on can be installed through the "Add-ons Manager" in Firefox.
- Start Firefox.
- Select Tools→Add-ons.
-
In the search field, enter
sqlite. - Click the search icon.
- Double-click to select SQLite Manager 0.7.7.
- Click Install.
- Click restart now.
- When Firefox restarts, select either Web Developer→SQLite Manager or Tools→SQLite Manager.